Simple 3d Floor Plan Drawing
Types of Plans
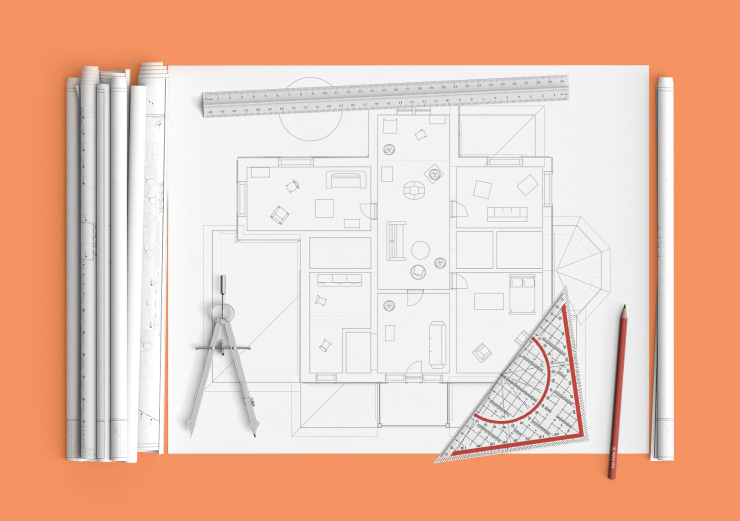
Floor Plans on Paper
Creating floor plans on paper will enable yous to visualize a large and detailed scheme of your project. Y'all are not limited in the selection of personal signs and marks in addition to full general ones to highlight of import notes and locations.
This traditional method is quite suitable. However, if you wish to gain more than flexibility and versatility, such as sharing the house newspaper templates with others to solicit their feedback, a digital version drawn on a computer or tablet is preferable.
Flooring Plans on a Computer or Tablet
Fifty-fifty though this solution seems overly complex for users who are not tech-savvy, there are many simple programs aimed at novice DIY users.
Overall, creating a flooring plan on a computer offers several advantages:
- Cartoon with computer tools is much faster.
- Whatever future modifications of the plan are really easy.
- Rapidly become the 3D plan based on the flooring program.
- Easily share the plan with others, regardless of the distance.
In the following article, we'll discuss the steps for cartoon a floor program on a computer.
Earlier You Start: Preparation
Site Measurements
If yous don't take to first from scratch and need to make a repair or renovation of an existing house or apartment, the first task to perform is to measure the outside walls and define the size of the interior walls. Don't forget to measure all the distances between the doors and windows and the height, width and elevation of these objects. It is also disquisitional to measure the size of the mouldings. Yous can apply Room Scanner on your iPhone or iPad to measure your room and get a digital floor plan in the blink of an centre.
If You Are Planning a New Business firm
Of course, if your aim is to create a new house, you may disregard the previous stride. Instead, it is critical to clarify the current offers on the market and decide which blazon of building you would like to see in the end. For instance, y'all should determine how many floors, bedrooms, bathrooms and entrances it volition include. You need to plan your futurity house thoroughly to avoid most common flooring plan mistakes.
If yous are unsure where to start, there are various gear up-made firm plans on the web. Check special architectural websites to identify the details you similar and dislike.
How to Describe a Flooring Plan on the Computer
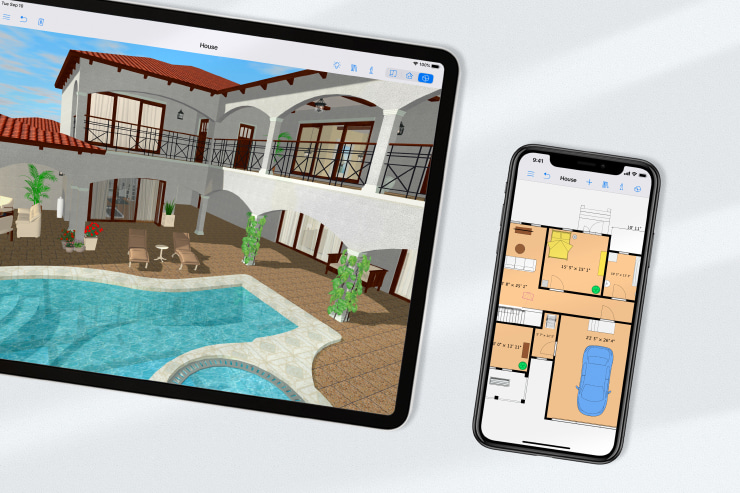
As nosotros mentioned above, we recommend creating a floor plan in a digital format. With modern technologies, even a tablet can be used for this task, which is neat news for those of us who have migrated to such devices.
Footstep 1: Find Interior Design Software
At that place are many habitation design apps─from simple ones to the almost professional. Some of them piece of work online, while others need to exist installed on a device.
Usually, native software installed on devices offers more functions and uses the power of the operating system to the total extent. A good case is when iOS apps utilize the AR (Augmented Reality) technology supported by the operating system. Online software is usually much slower and more limited, and it doesn't work without an net connection.
Every bit an instance for this article, we'll use Live Abode 3D. Live Home 3D is a multiplatform abode pattern software that offers native apps for each arrangement (Windows 10, macOS, iOS and iPadOS), while projects can still be shared among the platforms.
Stride ii: Choose the Project Calibration
Before you begin, y'all must cull the project scale. The well-nigh mutual scale for a room is 1:25, i:50 for an apartment and ane:100 for a house.
To select the convenient scale In Live Home 3D, go to Project Settings and choose your selection.
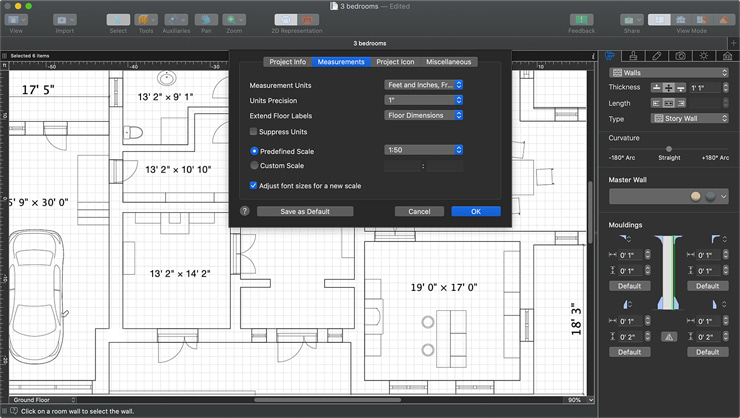
Step 3: Cull Measurement Units
Some other affair you should recall virtually before starting time work on your business firm plans is measurement units. Dissimilar countries and parts of the world employ different measurement systems. Software that'southward sold worldwide normally offers all the common options, so don't forget to select the one that is user-friendly for yous.
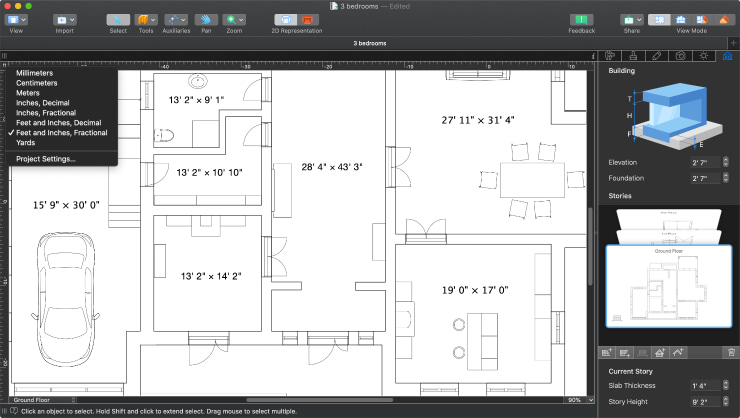
By default, Alive Home 3D operates on the Imperial Arrangement (east.g., inches and feet), merely you tin can hands switch to the Metric System (eastward.g., meters, yards). To do this, click on the drib-down lists in the peak left corner of the document window or select information technology in the Project Settings dialog box.
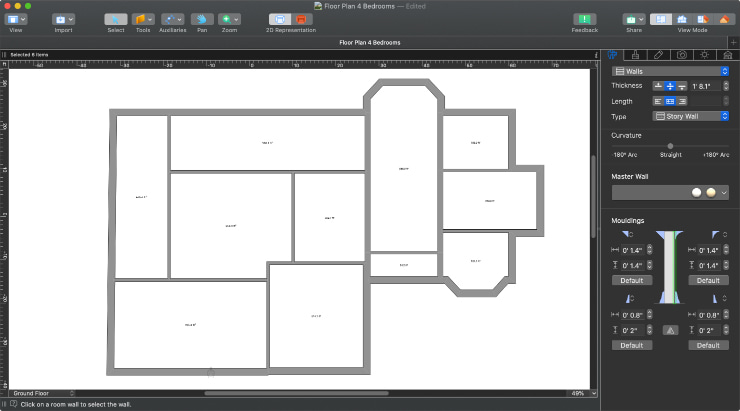
Stride four: Draw Walls
Of form, the floor plan begins with external walls. Every home design app has a straight wall tool. Utilise information technology to describe the perimeter of the room or the house.
Some apps offer tools to create custom-shaped spaces. Live Home 3D extends its building tools drove with Arc Wall for making more complicated projects such every bit round rooms or arc walls.
Internal walls divide the house into carve up areas. Add them advisedly following your plan.
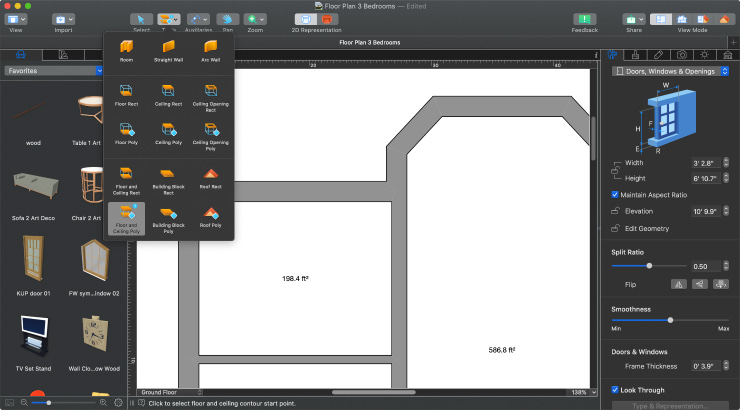
Step 5: Draw Floors and Ceilings
Once you lot've finished with the walls, draw floors and ceilings to complete the rooms.
In Alive Home 3D, y'all can create floors and ceilings of any shape cheers to special tools like Floor/Ceiling Poly for custom-shaped floors and ceilings, and Ceiling Opening Rect/Poly for ceiling openings.
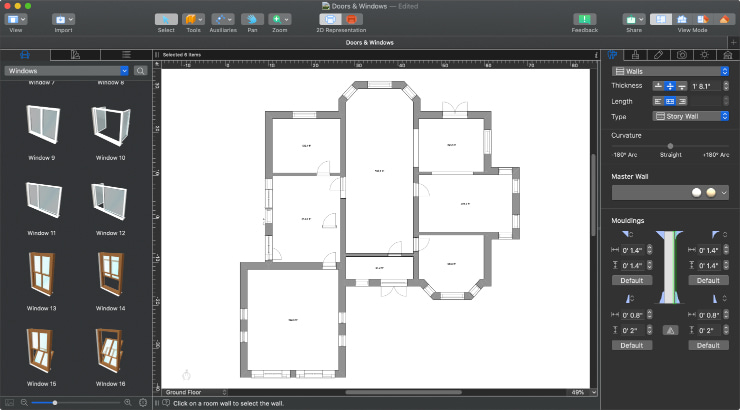
Step 6: Add Doors and Windows
After you take drawn all the walls, floors and ceilings, yous should add together doors and windows.
In Live Home 3D, you can drag and driblet them from a huge congenital-in gallery of objects, and they will be automatically integrated into the walls.
Step seven: Add Dimensions and Mark Footage
Measure out and mark lengths between unlike objects to emphasize important distances. Also, an important role of a floor plan is footage marks, so make certain you use them on your programme.
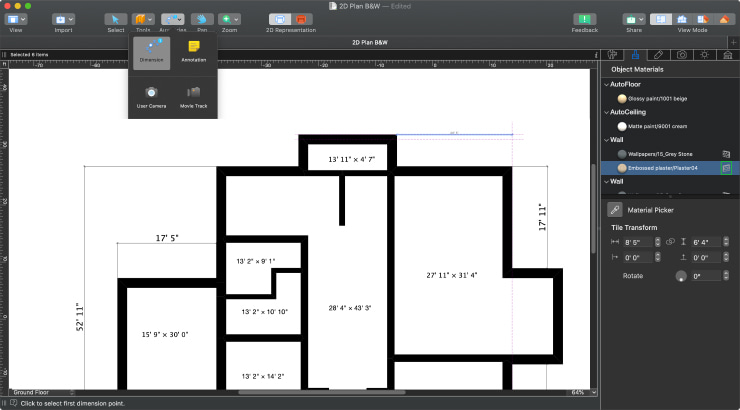
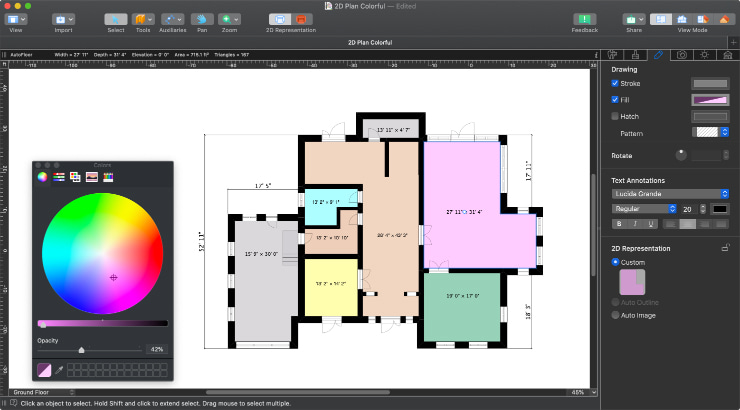
Step 8: Marking Different Areas With Colors
Mark different areas with separate colors to make your floor plan look attractive and help to visually identify singled-out spaces.
In Live Home 3D, by default, all the walls and floors on the plan are marked with the aforementioned color. To brand the program wait clearer and more appealing, you can gear up separate colors for dissimilar rooms past adjusting the fill, stroke and hatch parameters of the 2D drawings. You tin also choose between outline and raster prototype representation, and the latter will pigment all the objects on the plan with their existent colors.
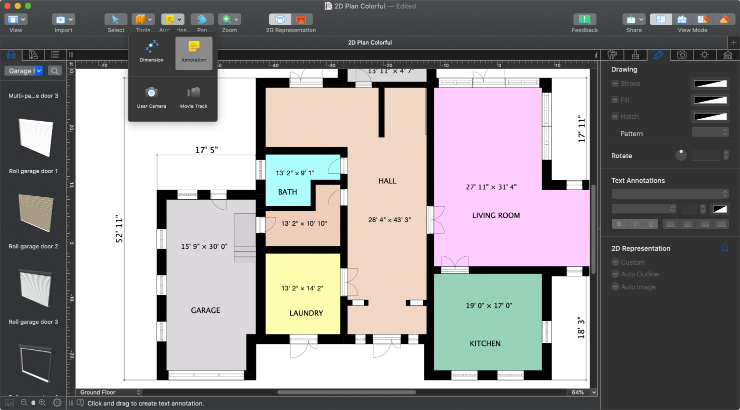
Step 9: Characterization the Rooms
Add labels to mark the rooms and all areas of the apartment or house.
Another smart manner to make a plan hands understandable is to identify the room names (eastward.g., hall, kitchen, dining room, bath, bedroom, etc.). Your flooring program will look more readable and professional person with room labels.
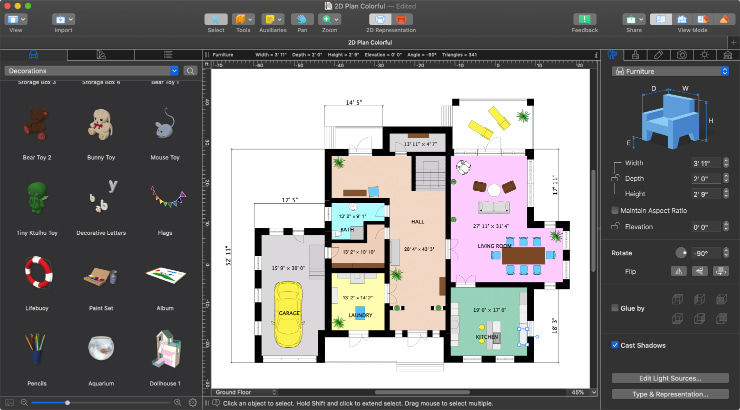
Step ten: Add together Furniture and Stairs
This is the part in which digital plans mostly finer come up into play. Add furniture and maneuver its location to decide the configuration you like the most.
Usually, the essential elements, such as stairs, baths, showers, toilets and sinks, are added get-go. Then add some essential furniture to the kitchen and plan the worktop, stove, sink, refrigerator and dining table location. And later all the rest, from beds and tables to plants and decorations.
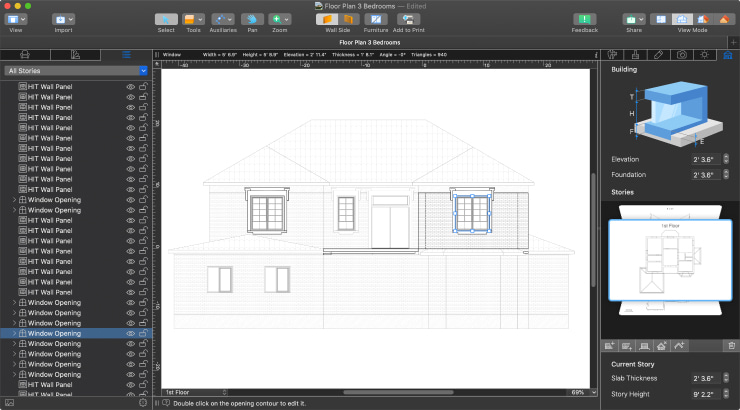
Footstep 11: Suit the Floor Plan in Elevation View
Elevation view is commonly available in professional architectural software; yet, it is useful for DIY projects every bit well. This feature displays the side view of a project, which helps you precisely arrange the position of the objects that are usually located above the floor, such as windows, openings, niches and wall panels. Elevations tin afterward be exported or printed to get the full vision of the plan.
Live Home 3D Pro is the only relatively affordable app that offers an Peak View.
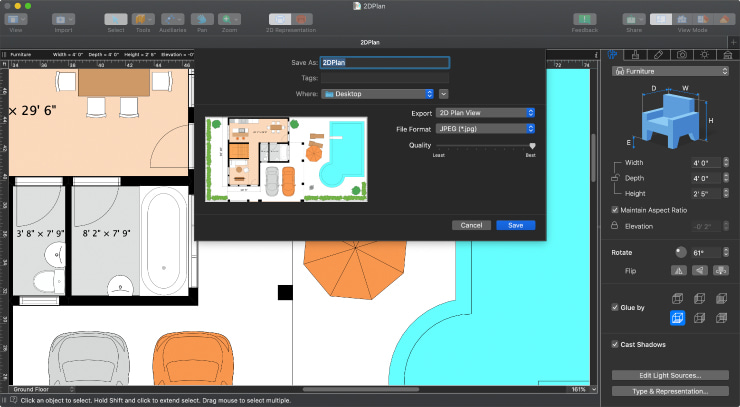
Stride 12: Export Your Floor Plan to a Graphic File
That'southward information technology! Your flooring plan is ready. After you accept finished, you might want to export it as a moving-picture show for sharing with your family, friends or contractors.
Live Home 3D can help yous export your floor programme in just a few clicks, offer advanced consign options to help you visualize exactly what you want on the concluding image. The app supports consign to multiple graphic formats, including PDF, BMP, TIFF, JPG and PNG. Acquire about 8 means to share your interior designs.
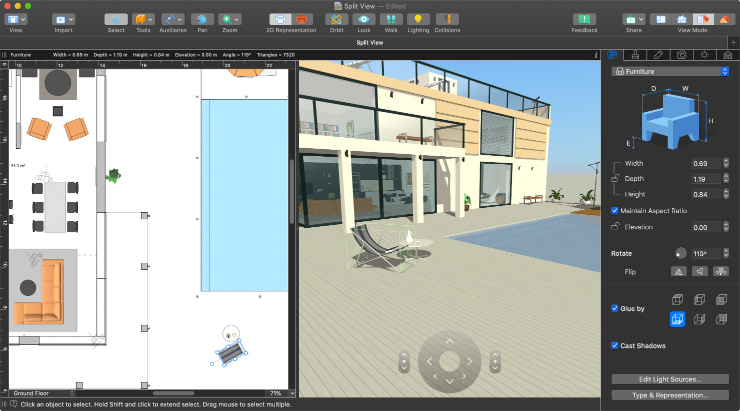
Await at Your Interior in 3D!
Here's an extra bonus one gets when using software like Live Domicile 3D. While you are drawing a flooring program, the program automatically creates a 3D view.
You lot can switch to 3D view any time and continue editing it in 3D mode if you prefer a more visual format. You lot would never become that chance when cartoon a floor plan on paper!
Lookout our "Creating a Floor Plan" tutorials to commencement drawing your flooring plans correct now.
Good luck to you with creating your flooring plans!
Published: May 2020
Source: https://www.livehome3d.com/useful-articles/how-to-draw-a-floor-plan
0 Response to "Simple 3d Floor Plan Drawing"
Post a Comment